
For these administering one or more databricks workspaces, cluster policies are an important tool where we spend some time with.
Introduction
But what are cluster policies?
Cluster policies are basically a json file with some parameters that we use to allow (or not) users to select certain things when creating a cluster. Not only users select (or deselect) but we can force some parameters of the cluster as well by default.
The purpose of using cluster policies is not only standarizing of forcing certain specific configurations but also to limit human error that can cost the copany lots of money by capping certain parameters to only allow specific machine sizes, maximum number of nodes, or the cluster timeout.
To be able to use cluster policies, you need to have a Premium workspace. And of course, be an admin of the workspace to be able to define them.
Format of a cluster policy and it’s elements
The format of a policy, as we said, its a json document:
interface Policy {
  [path: string]: PolicyElement
}
The type of policy elements we can use to control its quite long, and you have them explained in the official databricks documentation:
- Fixed policy
- Forbidden policy
- Limiting policies: common fields
- Allow list policy
- Block list policy
- Regex policy
- Range policy
- Unlimited policy
In this article, we will create a simple policy, that will preconfigure a cluster based on a specific machine size, we will restrict the maximum number of nodes to 5, and that will autotag the cluster with a specific key that we will define in the policy.
However there are endless possibilities so I recommend you to have a look at the official documentation to have yourself an idea of all the parameters you can configure here.
Creating a custom cluster policy
Ok, lets start! To create our first policy we need to log in into our workspace, go to the compute section and click on the cluster policies tab:
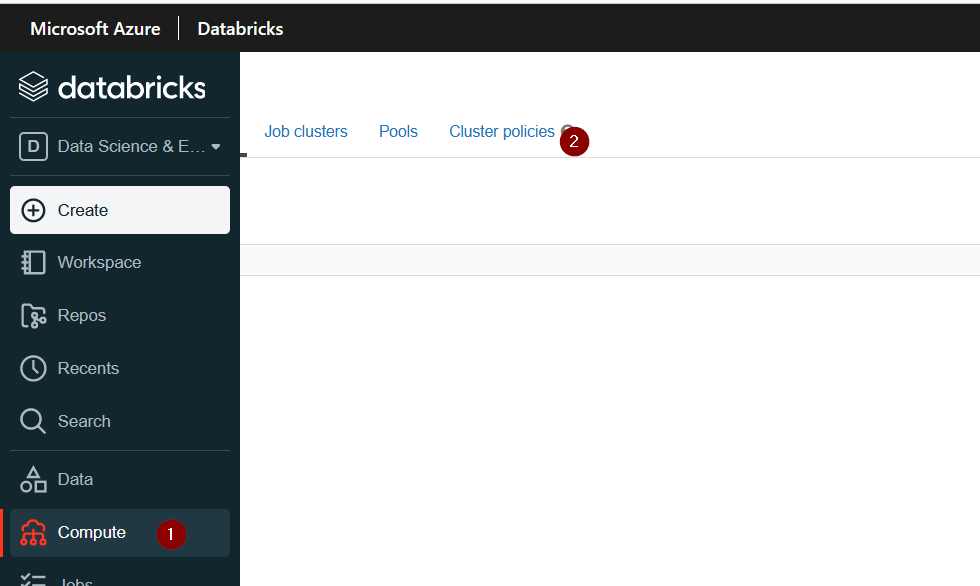
Then, there if we have rights (i.e. we are administrators of the workspace) we should see a buton called Create Cluster Policy. Once clicked we will see something similar to Fig 2:
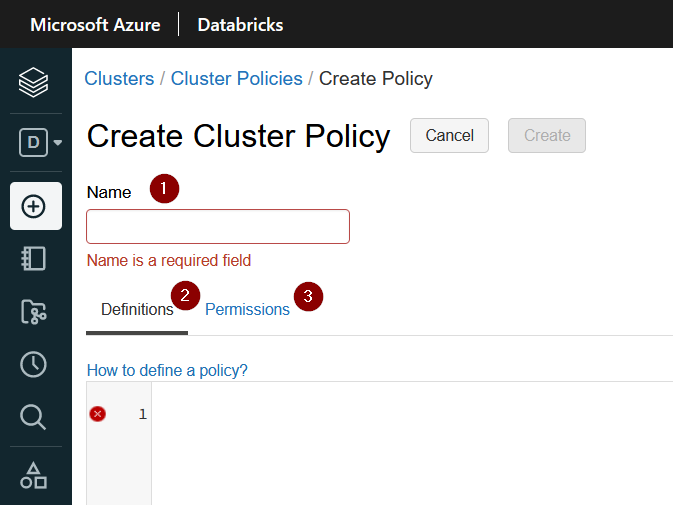
Here we have to concentrate on three things. The first one, is the policy name. This is the name your users will see, so I recommend to choose a meaningful name. For example multinode small cluster, or something like that.
Once the name is selected, we need to actually define the policy. This is a json area content box. In my sample case i want a to create a policy that chooses by default a machine with a small/medium size sku and maximum can autoscale to 5 nodes. Also i want to tag the cluster with a fixed string. To go further on this example, i will give the user a choice of two machines for the nodes, while the driver will be restricted to a specific vm sku. I will also set up auto termination to 10 minutes to make sure i am not paying for something not in use. My policy will look like the following:
{
  "node_type_id": {
    "type": "allowlist",
    "values": [
      "Standard_D8d_v4",
      "Standard_D16d_v4"
    ],
    "defaultValue": "Standard_D8d_v4"
  },
  "driver_node_type_id": {
    "type": "fixed",
    "value": "Standard_D8d_v4",
    "hidden": true
  },
  "autoscale.min_workers": {
    "type": "fixed",
    "value": 1,
    "hidden": true
  },
  "autoscale.max_workers": {
    "type": "range",
    "maxValue": 5,
    "defaultValue": 2
  },
  "autotermination_minutes": {
    "type": "fixed",
    "value": 10,
    "hidden": true
  },
  "custom_tags.project": {
    "type": "fixed",
    "value": "Albert"
  }
}
Once defined i will click on save. If the format of the policy is ok, the cluster policy will be created. I can then go to the permissions tab and assign it to users or groups. By default the policy is only assigned to be used by the admin group:

We will leave it as it is as we are just playing arround.
We can now try to create a cluster using this policy:
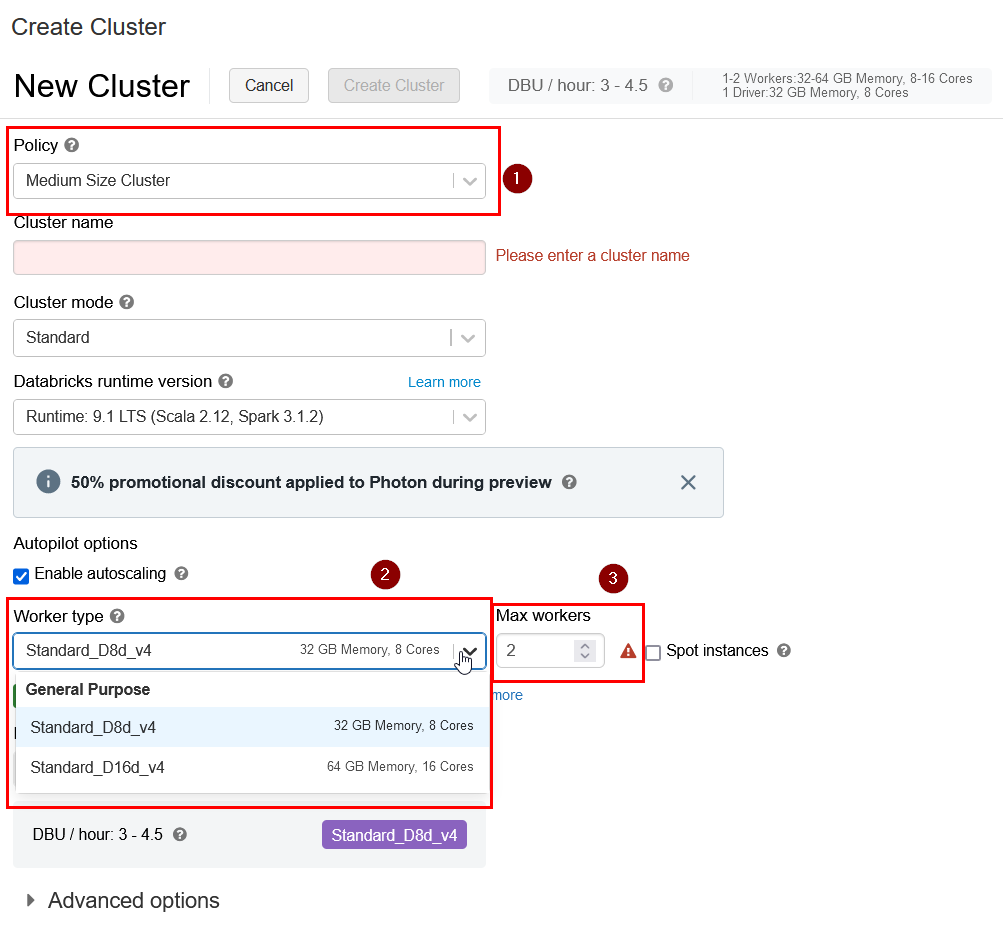
Select the newly created policy, then in the worker type by default in the policy we are choosing the machine sku Dtandard_D8d_v4 but we are allowing the user to chose a bigger one, and in the autoscaling we can choose up to 5 nodes. If we try to input 6 we will get an error: “Max Workers cannot be more than 5” and will not let us go through the cluster creation.
The driver type and the default cluster timeout are not seen as we dont allow the user to change it, they are set by default and we choose to mak them hidden. By removing the hidden attribute we will let the users to see the values but not modifying it:
"driver_node_type_id": {
"type": "fixed",
"value": "Standard_D8d_v4",
"hidden": true
},
...
"autotermination_minutes": {
"type": "fixed",
"value": 10,
"hidden": true
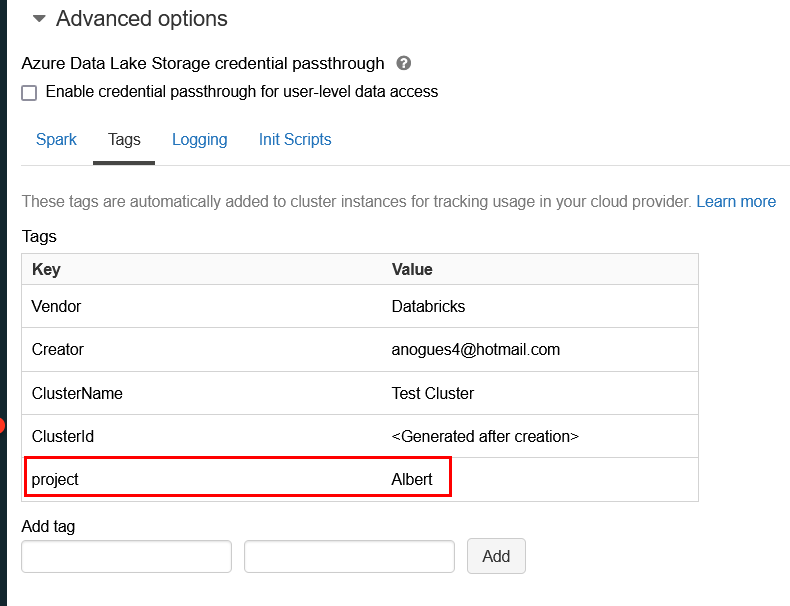
},And the last needed to be check is in the advanced options. We wanted to autotag the cluster with the project tag with a set string. If we uncollapse the advanced options we can verify how this tag is applied:
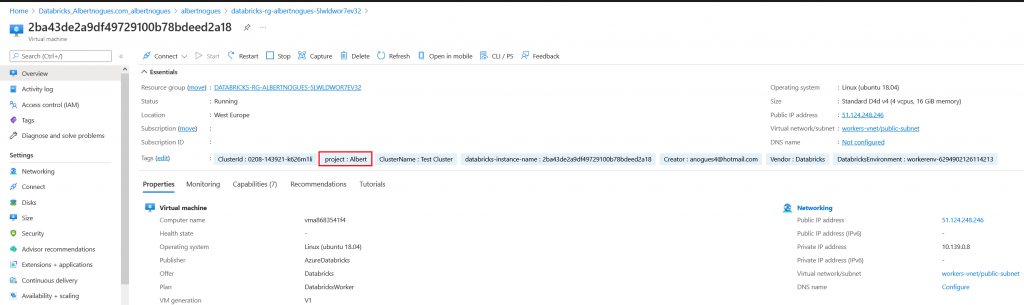
And if we go to our cloud provider and we check the machines created as part of the cluster we will see how the tag has also been propagated to the cloud resources. This will allow us to do cost analysis from the provider cloud portal.
Next Steps
There is also another very good article about defining the strategy when implementing policies. As this process can lead to some errors its important not to enforce the policies directly in a production workspace before testing. Databricks has created a reference methodology that i think it makes perfect sense when implementing these policies, starting by testing the policy, then create a barebone policy to do some tagging, then deploy the real policy but without enforcing it to any user (so it can only be selected optionally) and once tested everything is working as expected then enforce it to the users.
By using this framework you can simply correct all aspects that may be wrong before creating a potential issue to the final users.
There is also an interesting section in that article which is a worry usually for all of us that work for large user base. This is the tag enforcement of resources, very important when crosscharging between teams or different parts of the organization is required. In order to be able to input the costs to the proper project, department or other body, you need to enforce tagging of your resources. This is a very important topic when working on the cloud and while its a bit difficult to implement a proper tagging policy in databricks as you have mainly to rely on freeform text or some regex expression, you can try to build an effective system to crosscharge your projects or departments in the use of your databricks workspace(s).
This set of best practices and challenges is documented here and for me its an important resource for any databricks administrator.
Have fun!